Timesheet Tutorial
The Timesheet system in ERPNext is really simple, but it can be unintuitive at first. This walkthrough should help!
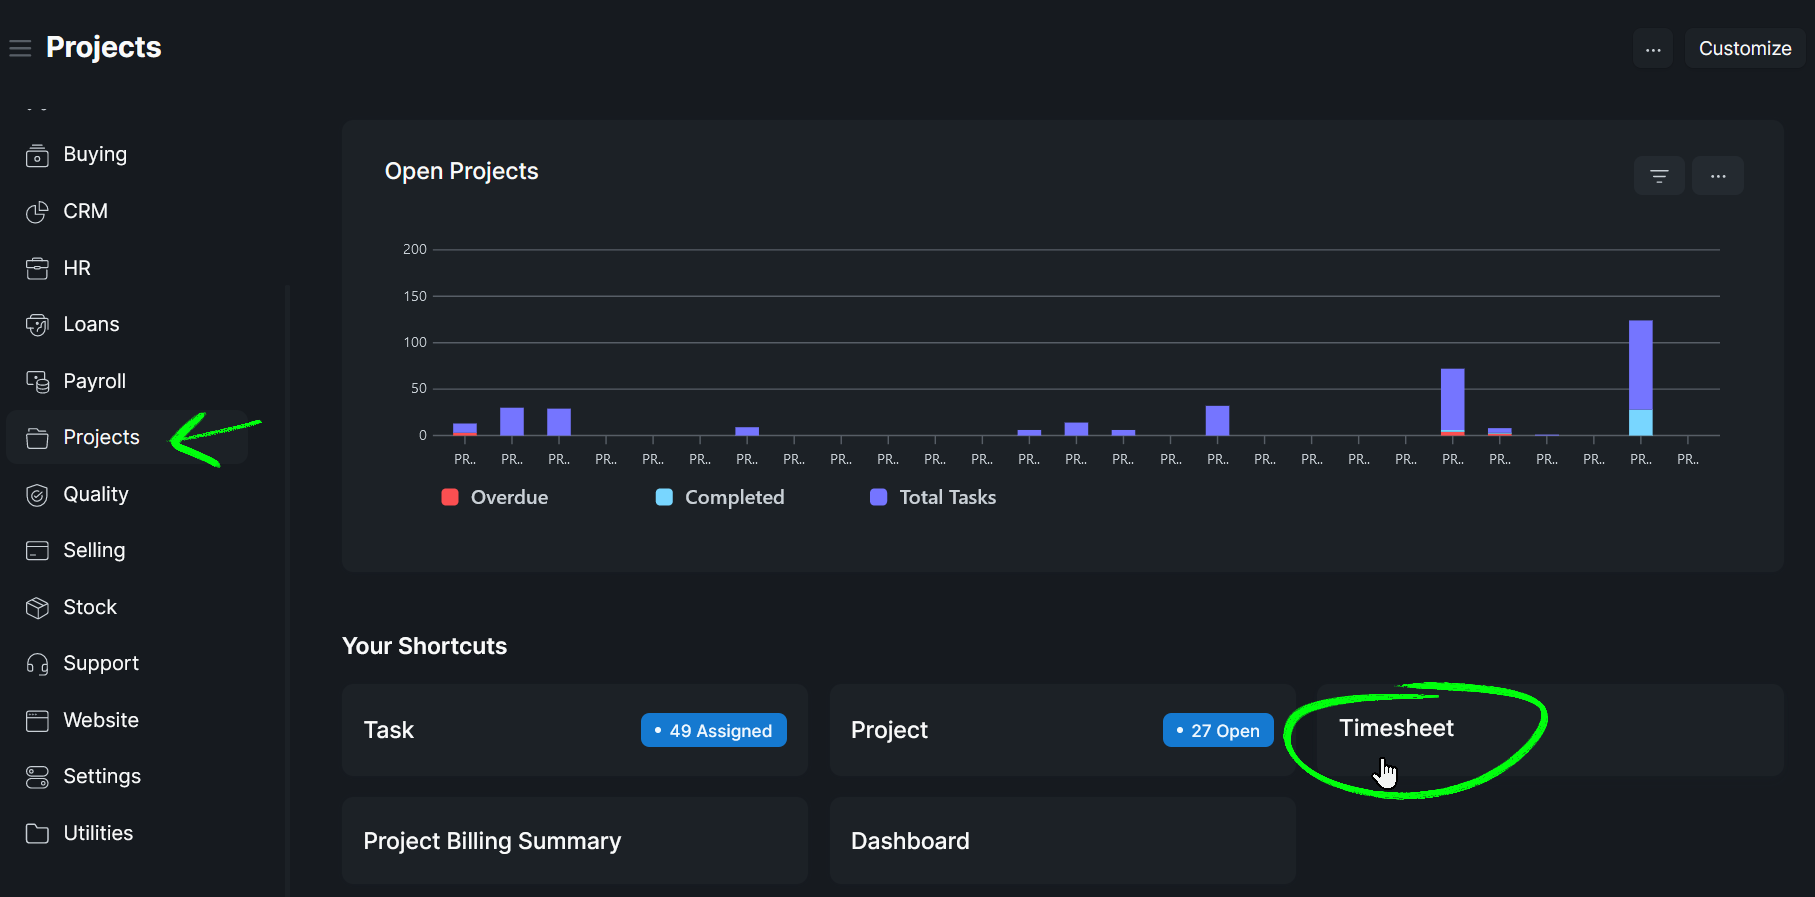
You'll want to begin in the Projects Tab, then open up a Timesheet.

You're on a New Page: Click the +Add Timesheet button.

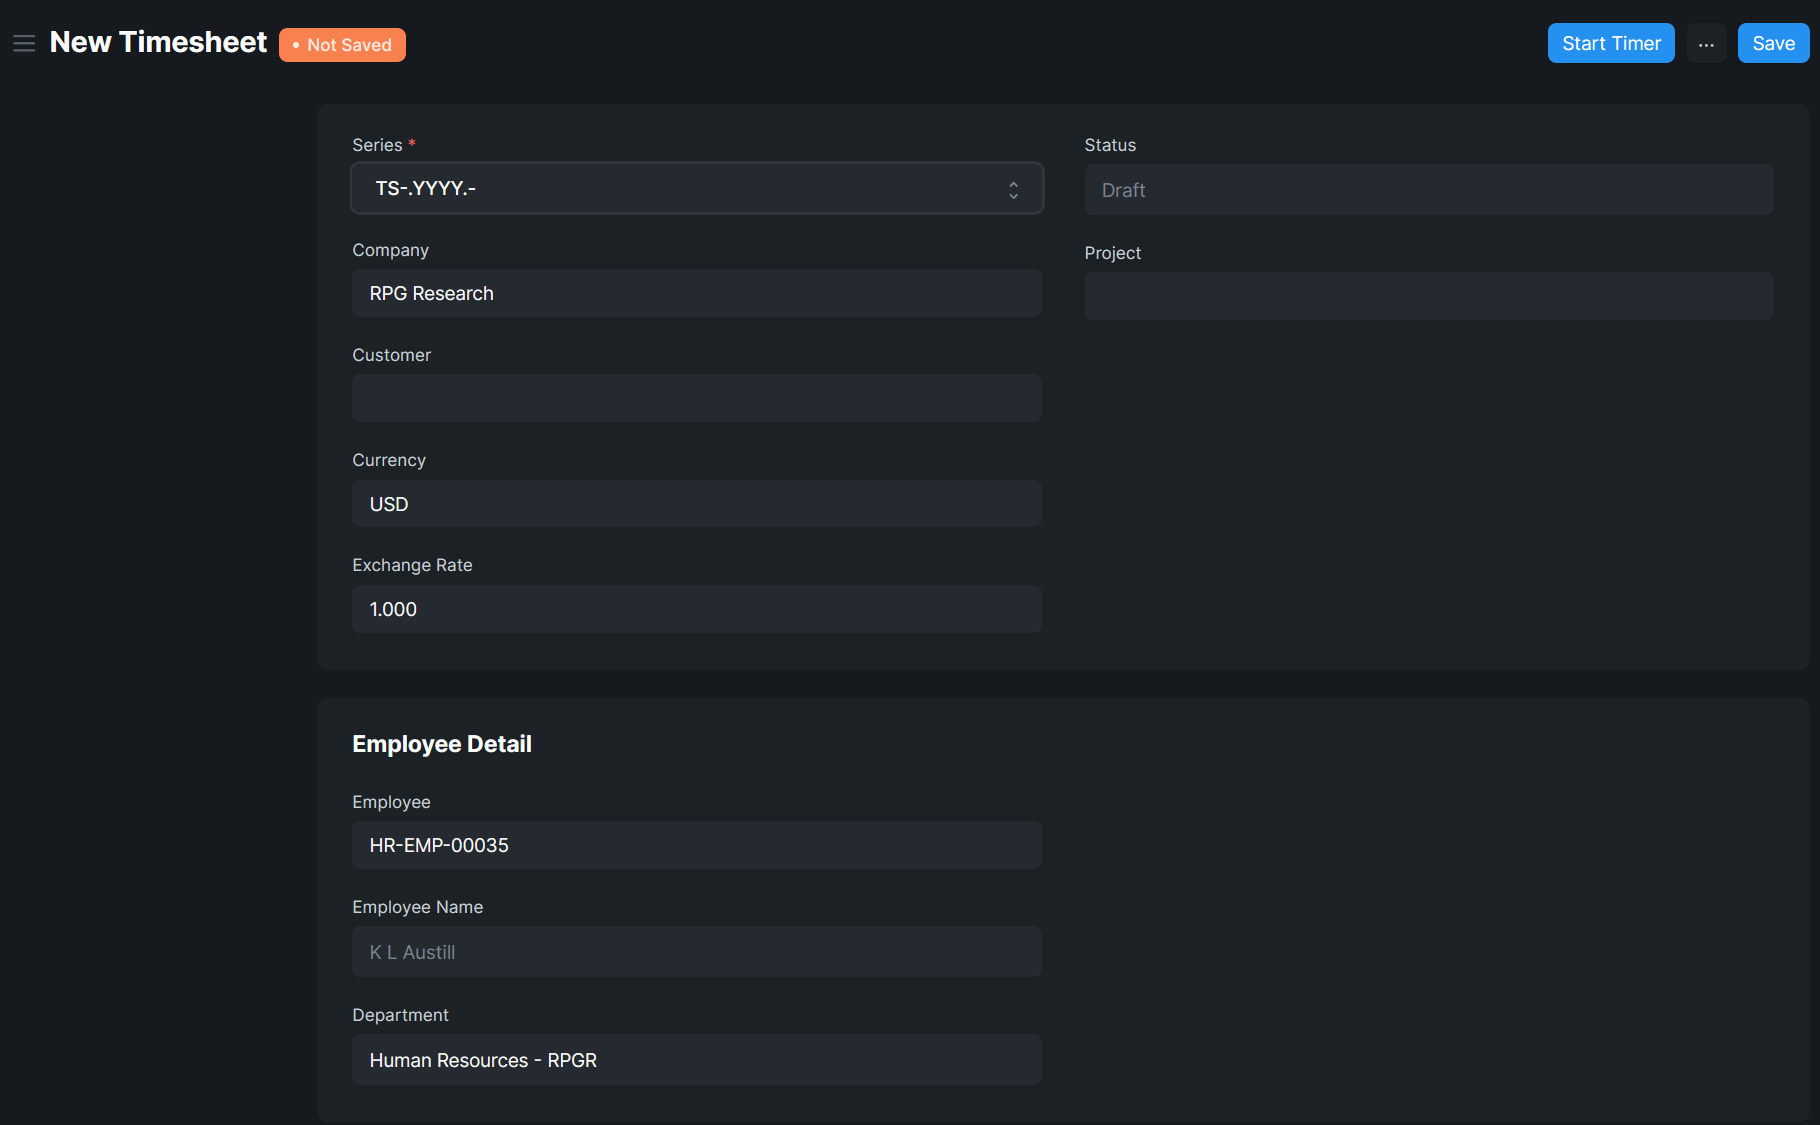
Nothing should need to change on the blank sheet. It will look something like this:

Just click Start Timer

In the timer popup, first select your activity (make a new one if you don't see something relevant), next select your project, and then select a task if you will be working on a specific task.
Then click the Start button.

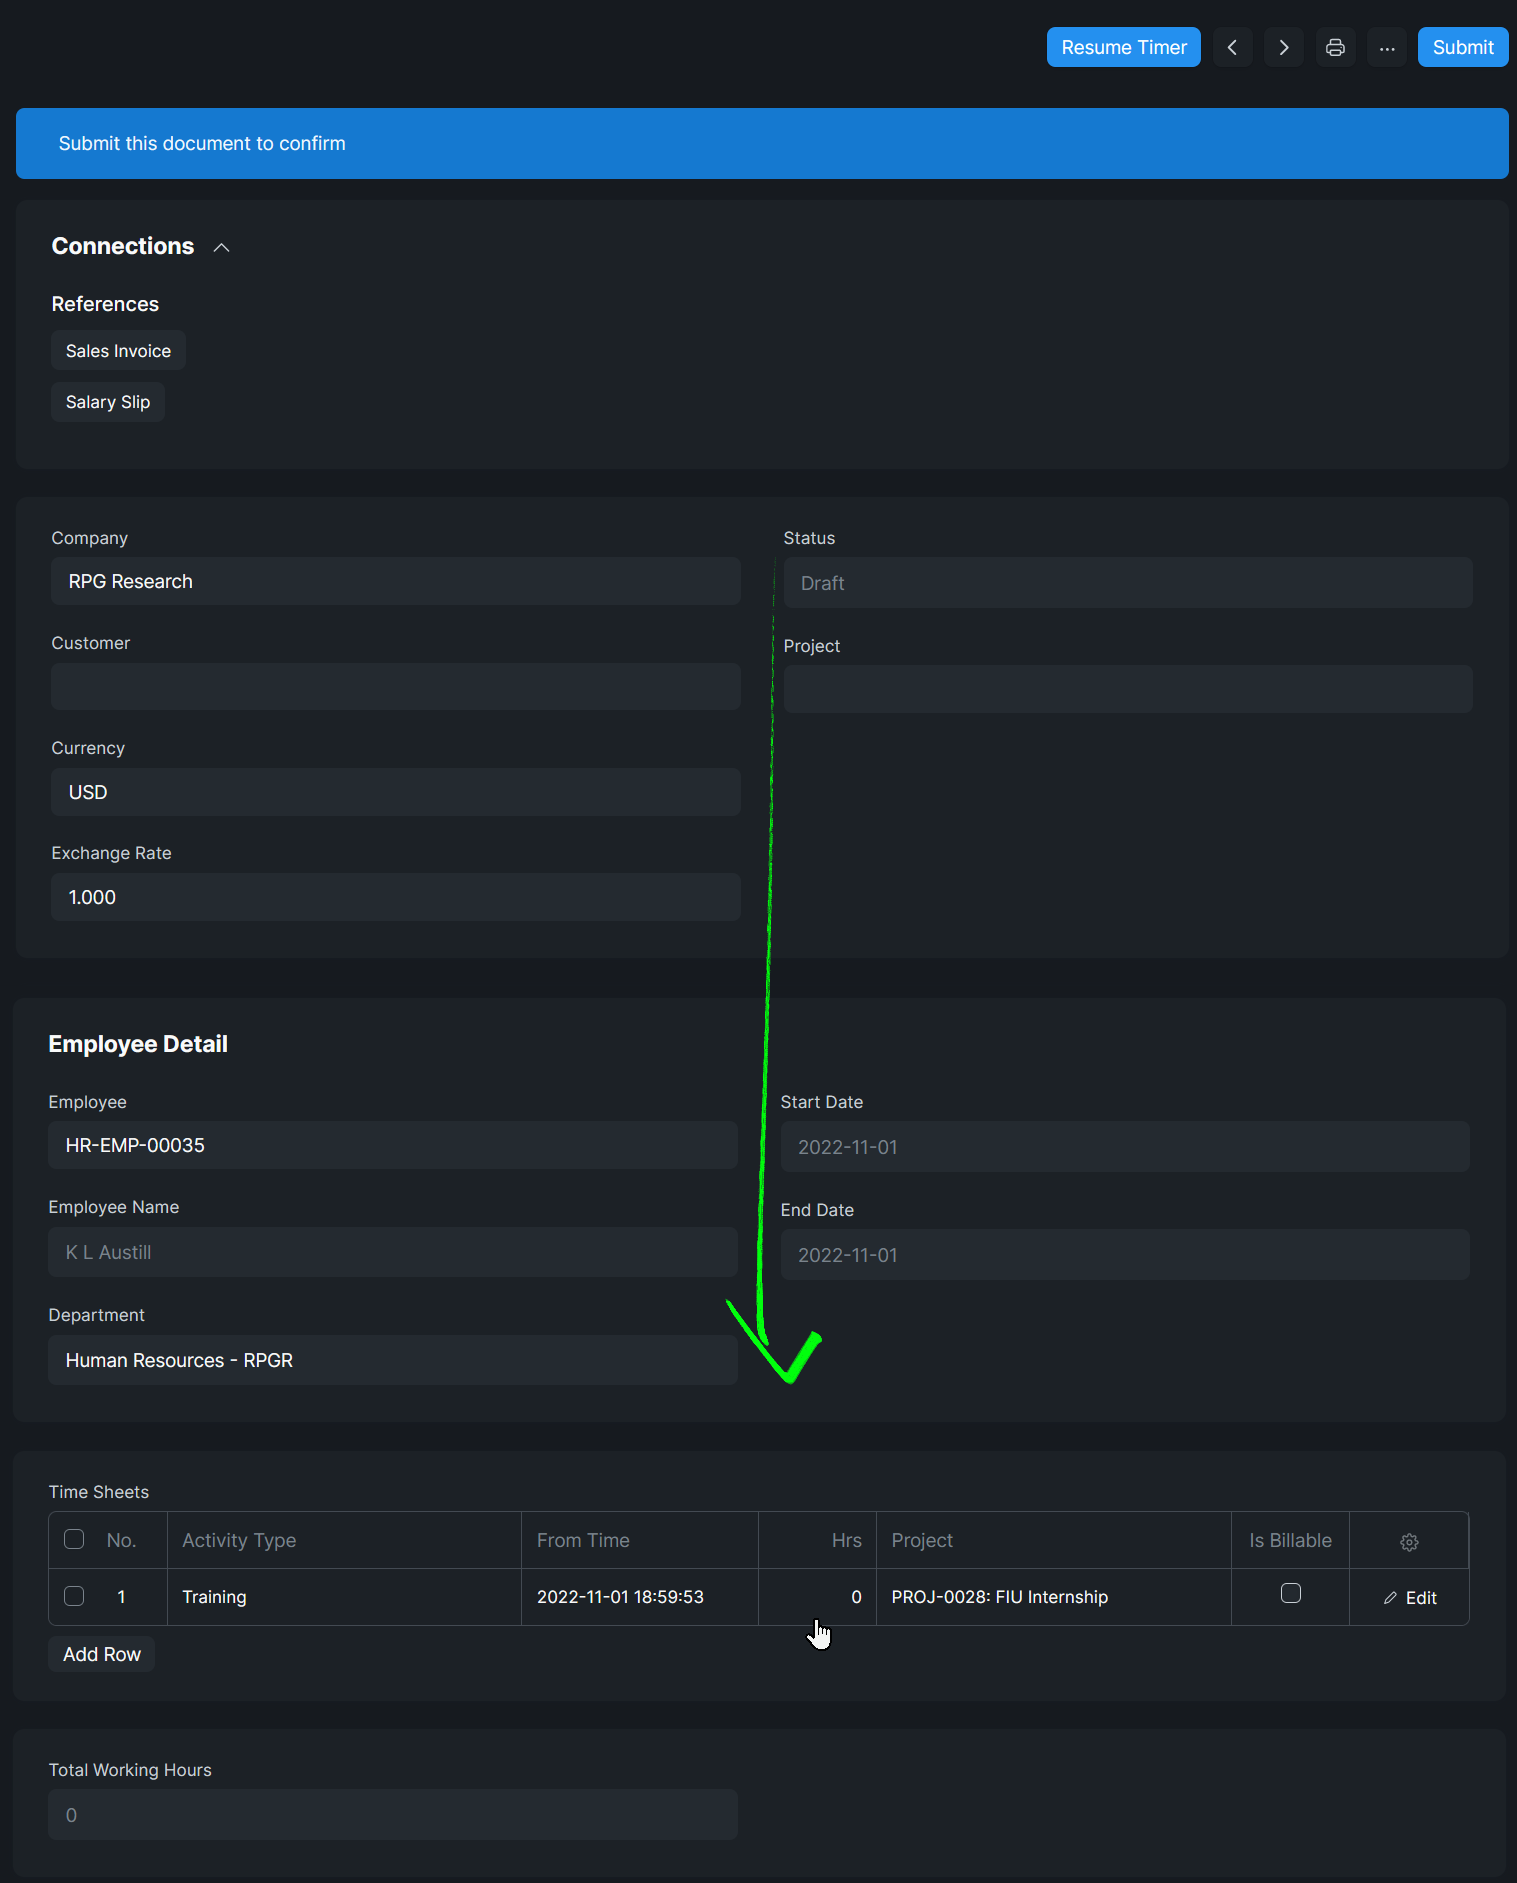
The timer popup will disappear, and you'll be back on your timesheet. If you scroll down, you can see the start of your current activity has been logged.

You may now go about your work and even leave the timesheet window until it is time to end the timer.
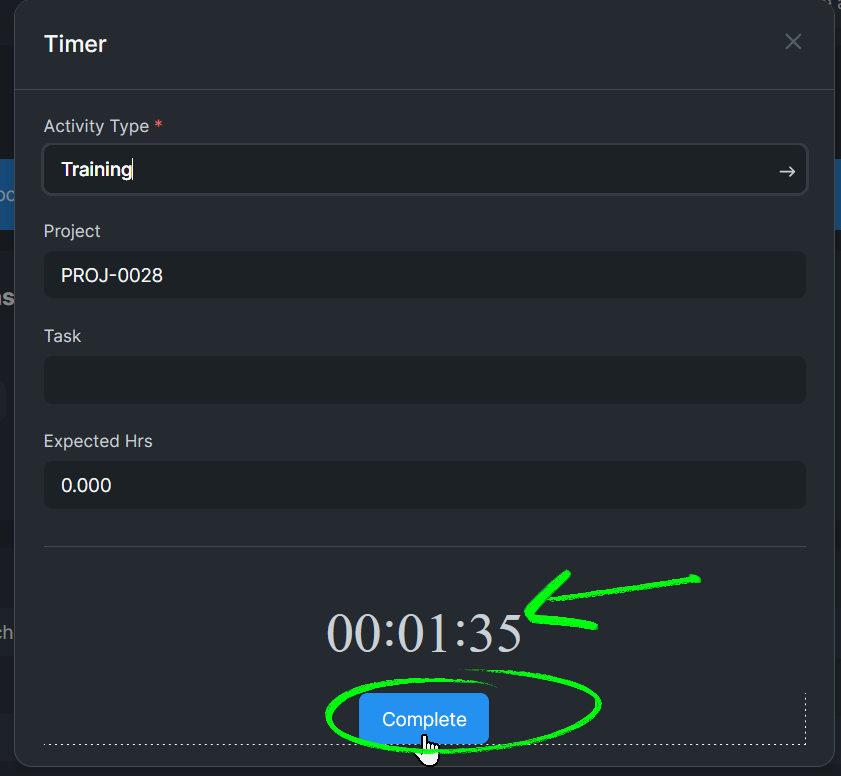
Simply go back into Timesheets and select yours, then click Resume Timer.

Check to make sure the time looks right, then click Complete.

Next, and these next two steps are important, scroll down to the log, note your hours.

Check the box marked "is billable".

And then Save your timesheet.

If these last few steps are not done, the timer will continue until you log in again, even if you've clicked Complete. The buttons along the top should look like this again before you leave:

Good luck, have fun! And happy volunteering!
No comments yet. Start a new discussion.